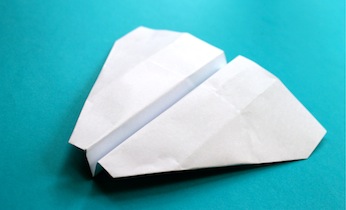
How to make a Nakamura Lock paper plane
This graceful Nakamura Lock paper plane design is a true paper plane classic that you should teach to your children. Making paper planes is a simple paper craft activity for kids that will also lead to some fun outdoor games as they fly their paper planes.
What you need:
- 1 x A4 sheet of paper
Number of players:
1
Activity:
Start with the classic paper plane figure: fold the paper in half lengthways, open it out. Fold each top corner to the middle crease.
Now fold it in half across its middle – folding the top point down to meet the bottom edge.
Fold the top left corner down to the centre of the vertical crease.
Do the same on the right side.
There will now be a point sticking down on your paper plane. Fold the point up to lock in the sides (see video).
Flip it over, so that the blank side is facing up.
Fold the left side over, so that you fold the entire thing in half.
To make the wings, fold the top flap over so that the edge at the top of the shape (the nose of the paper plane) is made up of two edges meeting up exactly.
Flip it over and do the same on the other side.
Pop out the wings, and give your Nakamura lock paper plane a whirl outside.
- Thanks to our sister company Kidspot Australia for creating the instructional video.

Leave A Comment
You must be logged in to post a comment.