
Make easy gift wrap on the computer
A lot of the time you will notice that all the birthdays seem to come at once so get the kids making their own gift wrap for their friends or the family with this step by step guide full of hints and tips on making your own gift wrap.
What you need:
- 4 printed pages of your wrapping paper
- scalpel
- cutting or chopping board
- sticky tape
- ruler
- computer with word processor
- printer
Number of players:
Activity:
Before you begin to create the seamless gift wrap, you need to create the gift wrap itself.
Here is a quick guide:
- Write in the child’s name, insert a little icon of your choice then copy and repeat until you fill the page.
- Print off one or multiple pages, enough to wrap your gift. Follow these easy instructions to making it bigger while hiding the seams.
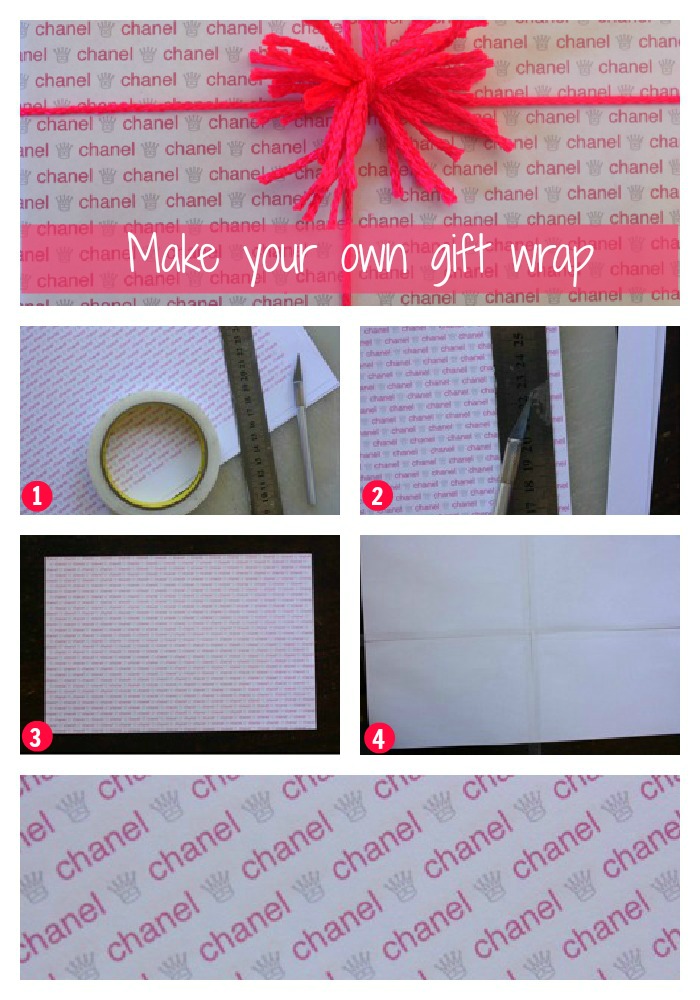
Step 1. Gather your supplies.
Step 2. Cut the excess border off each sheet with your scalpel and ruler as close to the words as possible.
Step 3. Now you have the borderless papers, make sure they are even.
Step 4. Line up all four together so the writing runs on as though one big sheet and turn over so the backs are facing up. Cut a long strip of tape and create a cross over the page edges, so all four are stuck together.
Wrap your present with your personalised wrap. Everyone will love the finishing touch!
Notes:
Here are some suggestions on symbols to use when creating your personalised gift wrap.
- Bus: Webdings “v”
- Skull & crossbones: Wingdings “Shift n”
- Spider: Webdings “shift 1″
- Flower: Wingdings “shift {”
- Bicycle: Webdings “b”
- Smiley face: Wingdings “shift j”
This craft was creatd by The Happy Home Blog.


Leave A Comment
You must be logged in to post a comment.